This is a great beginner’s project, if you ask me. I was able to get all four shadowbox units put together in one 2.5-hour naptime. Just in case you’re interested – or want to build these for your family room! – here’s how I did it.
1.) Decide how much storage space you need. I wanted to be able to store around 400 DVDs, so I wanted about 16′ of space. I made four units that are 48″ long, 8.5″ tall, and 5.75″ deep. We bought 8 boards of 1×6 pine (which is a total misnomer. One-by-six boards are actually seven-eighths-by-five-and-three-quarters. Who knew?!) and had the lovely guys at Lowe’s cut them to the sizes we needed. They didn’t even charge us for the cuts! We ended up with 8 boards 48″ long, 8 boards 9.75″ long, a box of sheetrock screws, 12 L-brackets, and 12 metal sheetrock anchors (a.k.a. mollies). We spent a grand total of $56.00. Supplies we already had on hand, that you’ll need to do this project yourself, were a power drill with a 1/8″ bit and a screwdriver bit; wood filler; sandpaper; and paint.
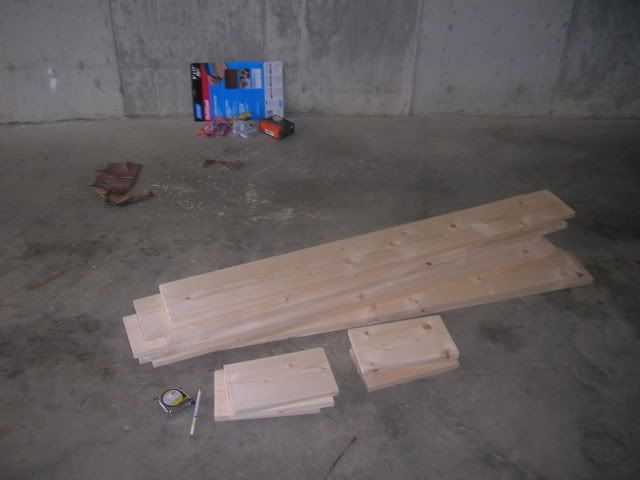
2.) Sand the rough, splintery edges where the Lowe’s guys hacked into the boards. Use a coarse grain sandpaper for this step.
3.) Measure the boards and mark where you will be drilling the pilot holes. On the short boards, I drilled a hole in each corner, all the way through. Make sure you put your board on top of a piece of scrap wood, unless you have a sawhorse or something. You don’t want your drill bit to hit the concrete of your garage floor.

Drilling the pilot holes in the long boards was a little tricker for me. I had to brace the end of the board against the floor in a 45-degree angle and then hold my drill at the same angle. This is probably *not* the best way to get a nice straight pilot hole! Plus, your bicep will be killing you after two or three boards. If you know of a better way to do this, please clue me in.
4.) Time to screw the boards together! It took me some trial and error on the first unit, but the rhythym came together eventually. I found it was easiest to:
-start all four screws into the short board. Let them come through the bottom a teeny bit.
-brace a long board against the wall of the garage at a 45-degree angle.
-line up the two screws at the top corners of the short board with the pilot holes in the long board. This is why it’s good to have the edge of the screw already through the board.
powerdrill the screws in almost all the way.
-stand up the second long board, and line up the bottom two screws of the short board.
-power drill the screws in all the way, and tighten up the top two screws.
-flip the unit over carefully, because it’s not totally stable yet!
-start all four screws into the second short board.
-position the short board on the two long boards.
-powerdrill the screws in all the way. They should even countersink (go below the plane of the surface of the board.)
-flip the unit over again, and countersink those four screws. (For some reason I couldn’t get them to countersink until this point in the process.)
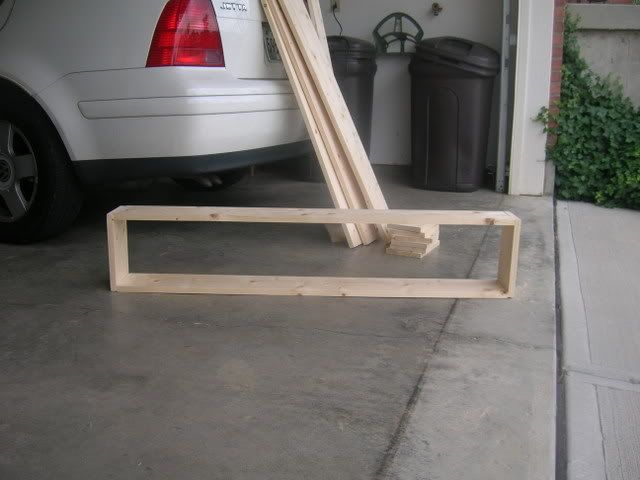
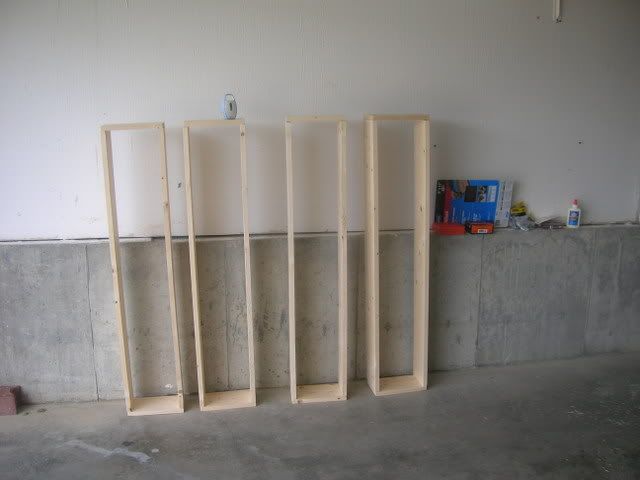
5.) Check to make sure the units are square, and not wobbly. Woo-hoo!
6.) Fill the space where you countersunk the screwheads with wood filler. You can also fill the spots at the ends of the boards where the Lowe’s guys hacked them and gave you that lovely splintery look.
7.) After the woodfiller dries, sand it smooth. You can use a finer grain sandpaper for this step.
That’s as far as I’ve gotten. Time invested so far, from shopping for supplies through doing the woodfiller: about 3 and a half hours. Not too bad!

3 thoughts on “Building DVD Shelves: Do-It-Yourself! #1”
Those look great, can’t wait to see them up on the wall! Go Builder Chelle!!! YOU CAN BUILD IT!
Oh wow. I am SO impressed. I’ve tackled a lot of projects in my day – but never even considered carpentry!!
Well, I did try to make high heels once when I was little – Small rectangle of wood with a nail for a “heel” and a strip of cloth tying it around my foot. It worked a lot better in my head than when I tried it. 🙁
Kari, sounds something like a Japanese wooden platform shoe. Figures that your only foray into woodworking would be beauty-related! LOL
Hol, thanks! You are my official cheerleader! 😉